1. CURRICULUM ALIGNMENT
- Syllabus Objectives:
- To understand carving as a “subtractive” sculptural process.
- To identify suitable materials for carving (wood, stone, soft rock, or industrial materials like foam/soap).
- To practice safe tool handling and the stages of carving from block to finish.
- Prerequisite Knowledge: Relief sculpture (Topic 3.8) and understanding of 3D form (pottery).
2. TOPIC INTRODUCTION
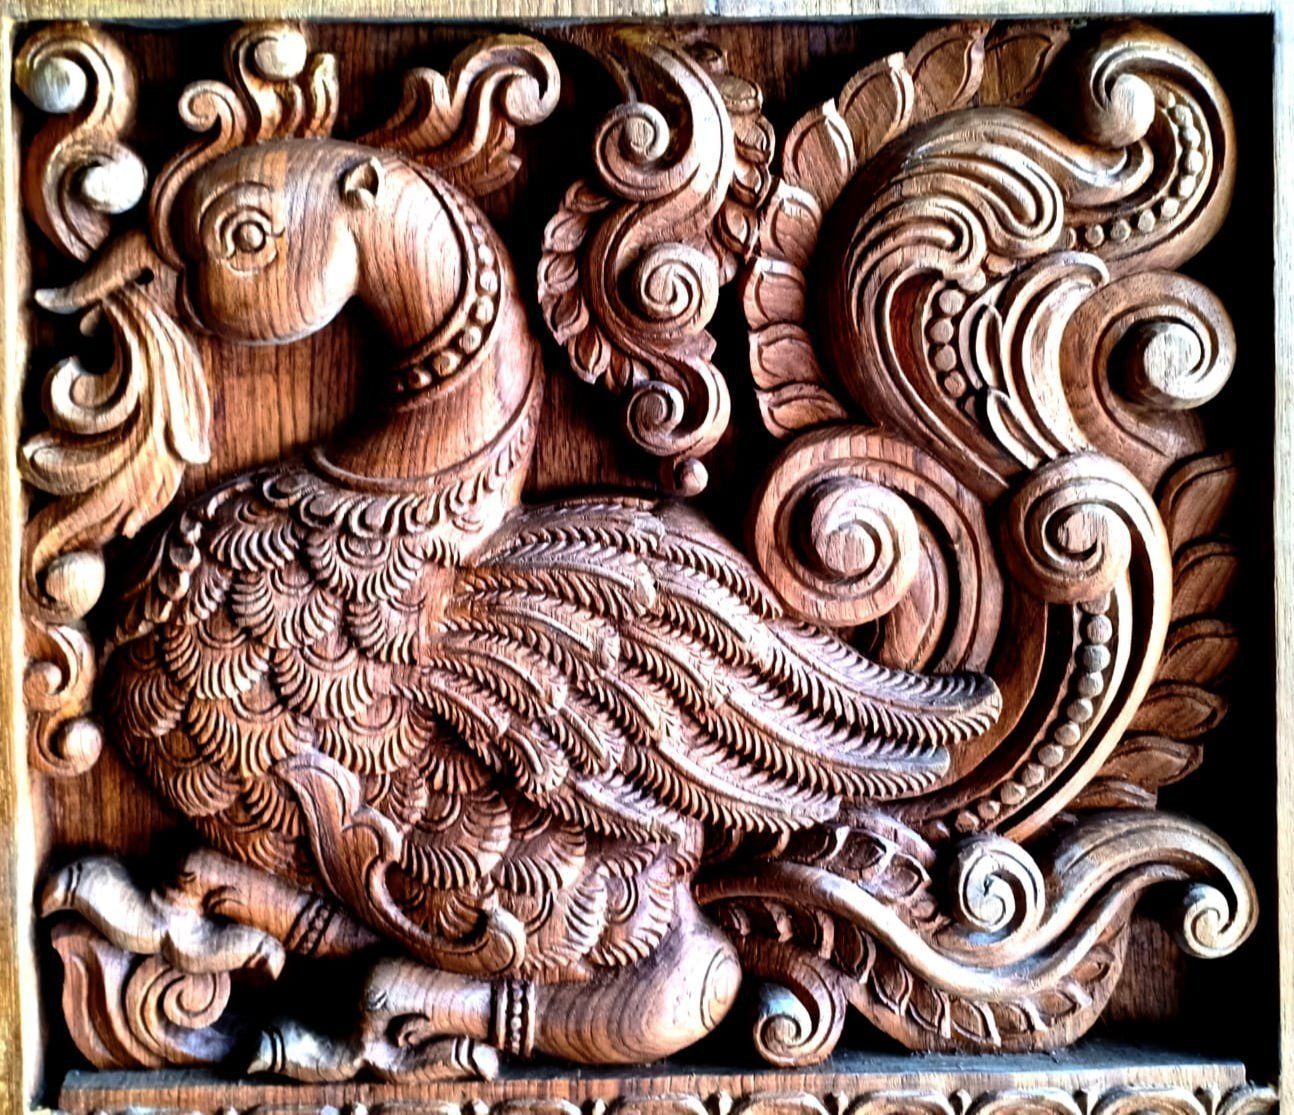
Carving is perhaps the oldest sculptural technique in human history. Unlike clay modeling, which is additive (building up), carving is strictly subtractive (taking away). You start with a solid block and “reveal” the image hidden inside. In Uganda, this has a rich history, from traditional wooden headrests and stools to intricate door carvings and ceremonial figures.
The Hook: Michelangelo, the great sculptor, once said that he didn’t create a statue; he simply “chipped away the excess stone to set the figure free.” When you carve, you aren’t adding; you are refining.
3. LEARNING OBJECTIVES
By the end of this lesson, learners should be able to:
- Explain the subtractive nature of carving.
- Identify safe and effective carving tools (chisels, mallets, knives, rasps).
- Execute a design by carving into a block of material.
- Demonstrate proper safety protocols to prevent injury.
4. KEY TERMS AND DEFINITIONS
- Subtractive Process: Removing material to create a form.
- Grain: The natural pattern of fibers in wood; carving against the grain can cause splitting.
- Rasp/File: A tool used for smoothing the surface after the bulk material is removed.
- Chisel: A metal tool with a sharp edge used for cutting/carving.
- Finishing: Sanding, polishing, or oiling the surface to protect the material.
Memory Hook: “Think before you cut.” In clay, you can add more if you make a mistake. In carving, once you cut it away, it is gone forever.
5. DETAILED EXPLANATION OF CONCEPTS
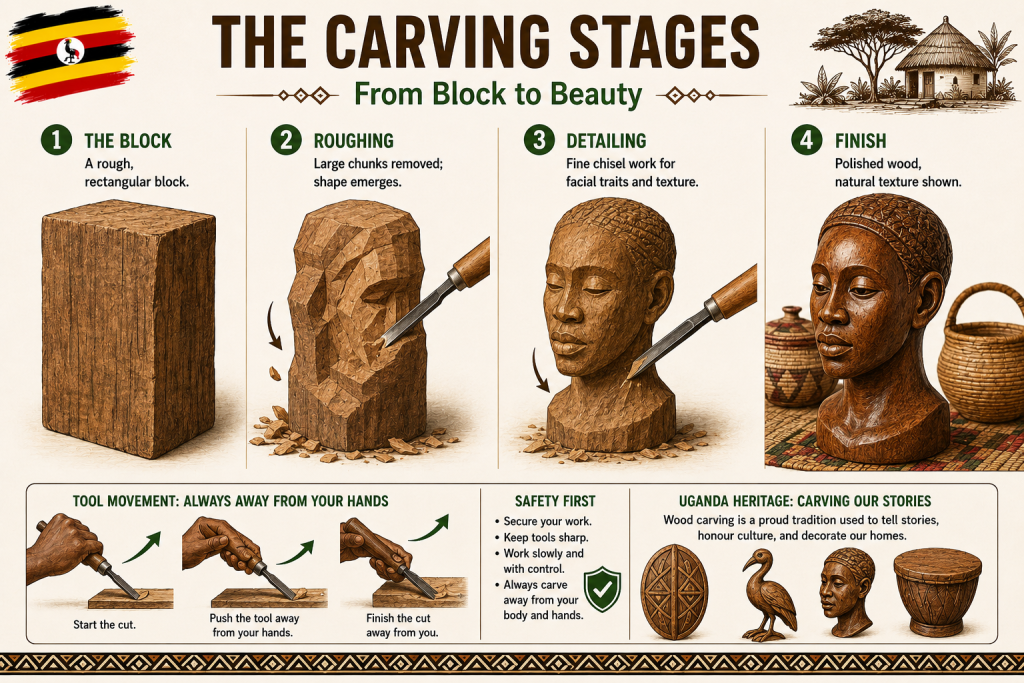
A. The Carving Workflow
- Planning/Blocking: Draw your design on the sides of your block.
- Roughing Out: Removing large chunks of excess material to get the general shape.
- Refining: Using smaller tools to shape the features (the “curves”).
- Smoothing/Finishing: Using sandpaper or rasps to remove tool marks.
B. Safety First
- Direction: Always carve away from your body and hands.
- Work Area: Keep your hands behind the blade at all times.
- Vise/Clamp: Never hold the carving block in your hand; clamp it to a table so it doesn’t slip while you push the chisel.
| Material | Characteristics | Best for… |
| Softwood | Easy to cut, visible grain | Beginners |
| Soap/Foam | Very soft, no grain | Practice/Prototypes |
| Hardwood | Durable, detailed, complex | Experienced carvers |
6. VISUAL LEARNING SUPPORT
The Strategy of “The Silhouette”
Before you make your first cut, you must understand the Silhouette.
- The Concept: View your block from the front, the side, and the top. Draw the outline (the silhouette) of your subject on these faces.
- Why it matters: If your silhouette is wrong, your final sculpture will look “flat” or distorted. When you carve, you are essentially “chasing” these three silhouettes into the center of the block until they meet. If you cut past these lines, you have lost your form.
Understanding “Grain” (The Wood Carver’s Map)
In Uganda, we work with many beautiful woods (like Mvule or Mahogany). The Grain is the direction in which the tree fibers grew.
- Carving “With” the Grain: The tool glides smoothly, and you can achieve long, elegant shavings. This is the goal.
- Carving “Against” the Grain: The tool will “chatter” or jump, and you will likely tear or split the wood.
- The Test: Always make a small, light test cut in an inconspicuous area. If the wood tears, turn your block 180 degrees and cut from the other direction. Respecting the grain is the difference between a amateur and a master.
[Visual: A diagram showing a chisel moving smoothly “with the grain” vs. tearing “against the grain”]
Tool Control: The “Two-Handed” Rule
Safety is not just about avoiding injury; it is about precision.
- The Guiding Hand: One hand should always be placed on the shaft of the chisel, close to the cutting edge. This hand is your “brake”—it controls the depth and speed of the cut.
- The Driving Hand: The other hand (or your mallet) provides the force.
- Pro-Tip: If your “guiding hand” is tired, stop carving. A tired hand loses its grip, and that is when accidents happen.
Advanced Finishing: From Rasp to Polished Surface
The final look of your carving is determined by your patience during the finishing stage.
- The Rasp: Use this first to remove the “facets” (the flat marks left by your chisel).
- The File: Use this to smooth out the deeper scratches left by the rasp.
- The Sandpaper (Graduated): Never skip steps. Start with coarse grit (e.g., 80), then move to medium (120), then fine (240+). If you try to go from coarse to fine too quickly, you will just be scratching the wood with the larger grit, and the surface will never look smooth.
- The Oil (The “Pop”): In Uganda, we often use natural oils (like linseed or even vegetable oil, depending on the use) to seal the wood. The oil penetrates the fibers, makes the grain “pop” (becoming visible and rich), and protects the wood from cracking in the heat.
Troubleshooting: “The Oops Moment”
What if you cut too deep?
- The Professional Fix: Change your design! If you accidentally carve a cheek too deep, don’t try to “glue it back.” Instead, carve the other cheek to match. A great carver is one who knows how to adapt their design based on the material’s behavior.
7. TEACHER DEMONSTRATIONS AND PRACTICAL ACTIVITIES
- Demonstration: Show how to safely use a wood chisel with a mallet. Emphasize that the mallet should do the work, not your own physical strength.
- Practical Activity: “The Soap Totem.” Students carve a small, simple geometric or animal totem from a bar of soap, focusing on “subtractive” thinking.
8. LEARNER ACTIVITIES
- Inquiry: Ask a local carpenter or sculptor: “What is the hardest part about working with the wood grain?”
- Creative Task: Design a 3-step plan for carving a small wooden spoon. What part of the block will be the handle, and what will be the bowl?
- Formative Assessment:
- Why is carving called a “subtractive” process? (2 marks)
- List three safety rules for using carving tools. (3 marks)
- Why do we sand or oil the wood after carving? (2 marks)
9. COMMON MISCONCEPTIONS
- Misconception: “The deeper I cut, the better the sculpture.”
- Correction: Carving is about control. Shallow, controlled cuts often produce better details than hacking away at the block.
- Misconception: “I can fix mistakes by gluing pieces back on.”
- Correction: Carving is an art of patience. Glue rarely looks natural on a carved surface.
10. SUMMARY NOTES
- Safety: Always carve away from the body.
- Patience: Work in stages—Roughing to Finishing.
- Grain: Respect the direction of the material fibers.
- Precision: Carve only what you need to remove.
11. EXAMINATION FOCUS (UNEB-style)
a) Multiple Choice: Which tool is used for smoothing the surface of a carving? A) Mallet B) Rasp C) Chisel D) Drill (Answer: B)
b) Structured: State two reasons why wood grain is important to a carver. (4 marks)
c) Essay: Explain the safety precautions required when working with chisels and mallets in the art studio. (10 marks)
12. HIGHER ORDER THINKING QUESTIONS
- If you were carving a design into a piece of wood for a wall hanging, how would the wood’s natural grain influence your design choices?
- How does the “subtractive” nature of carving force an artist to be more prepared than an “additive” artist using clay?
13. TEACHING TIPS
- Tool Sharpness: A dull tool is more dangerous than a sharp one because it requires more force, leading to slips. Keep chisels sharp.
- Practice Material: If wood is unavailable, use dense blocks of Styrofoam or even hard clay blocks that are allowed to dry slightly.
14. GLOSSARY
- Subtractive: Removing material.
- Grain: Fibers in wood.
- Rasp: A coarse file.
END: KEY TAKEAWAY FOR LEARNERS
Carving teaches you to look inside a block and see the form hidden within. It requires focus, respect for your tools, and the patience to remove only what is necessary.
0 responses on "AD3: Three-Dimensional Arts: Carving"